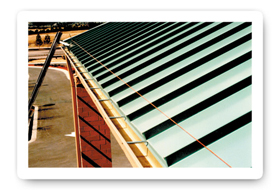
To help you design a ColorGard system for your purposes, we invite you to use the ColorGard Calculator.
You may also want to download and print complete documentation on installing the ColorGard® system, by clicking here.
ColorGard® is easy to install.
First, at the desired location, use a string line
across the top of the panel seams - this will establish a true line for
installation of the S-5!™ clamps. Individually measuring each clamp
location from the eave is not recommended.
When installing clamps on roof panels which utilize a
two-piece panel attachment clip, the clamp may be installed at a clip
location if desired. When the panel system utilizes a one-piece clip,
installing at clip locations should be avoided.
If the ColorGard® assembly utilizes the VersaClip™ for attachment of the ColorGard® crossmember, the bolt hole in the clamp should be at the upslope end of the clamp.
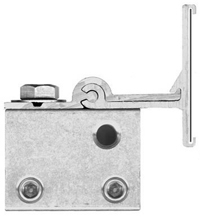
If the assembly does not use VersaClip™,
the hole should be at the downslope end of the clamp. Determine which
side of the clamp to load the setscrews into, and assemble all
setscrews to all clamps, being careful that the bolt hole will be in
the correct (upslope or downslope) orientation, with the setscrews on
the correct side of the seam.
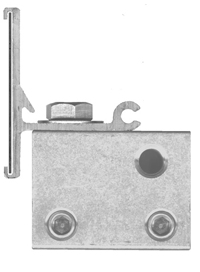
S-5™ clamps are available to fit almost any seam. Refer to the Clamp section of this Web site to view installation instructions.
Position the clamps appropriately on the panel seam, using the string line as a guide.
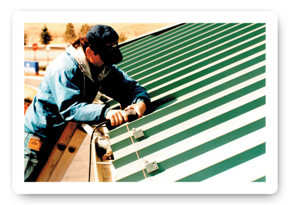
Using the Allen-wrench
attachment tip for 1/4" screwgun (included in the box), tighten and
retighten setscrews as the seam material compresses. On low seam
profiles, clamp spacing should never exceed 32".
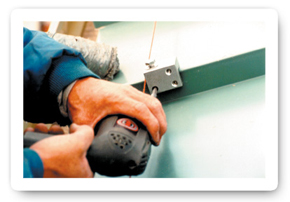
We
recommend using the Angle Driver (available at your S-5!™ distributor)
to facilitate easy installation and avoid damage to the panel.
NOTE:
Do not be concerned if after installation the clamp
appears slightly "cocked" on the panel seam. It will straighten out
when ColorGard® is installed.
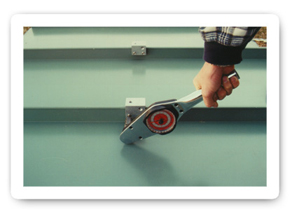
The holding strength of S-5!™ clamps is highly dependent upon setscrew tension. Consult the S-5!™ Load Tables by clicking here
For maximum holding strength, setscrews should be
tensioned and re-tensioned as the seam material compresses. Clamp
setscrew tension should be verified using a calibrated torque wrench
between 160 and 180 inch pounds when used on a 22-gauge steel, and
between 130 and 150 inch pounds for all other metals and thinner gauges
of steel. Published data regarding holding strength is available for
viewing here.
CAUTION:
Battery operated guns may not deliver consistent screw tension.
Drywall guns may not deliver adequate tension.
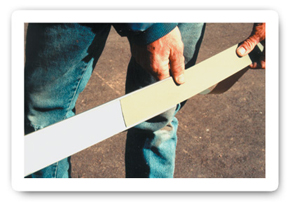 Color strips should be sheared
from the same prefinished metal as the roof panels. Shear strips to
exactly 2" wide (8' or 10' long). Slide the color strip into the
ColorGard® crossmember as shown. If the strip length is 8 feet, it may
be pre-assembled into the ColorGard® crossmember. If the strip is 10
feet long it will be assembled into the ColorGard® as installation
progresses.
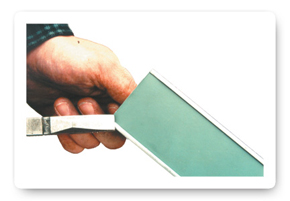 Joints in the ColorGard®
can be concealed, if desired by offsetting the joints of the color
strip from the joints of the ColorGard®. When this is done, the joints
of the color strips should be overlapped about 1/2 inch.
Each color strip should be anchored to the ColorGard®
somewhere along its length. This is done by pinching the retainer lip
of the ColorGard® with an ordinary pair of pliers. It can be done at
one end of the ColorGard® section as shown, or anywhere along its
length. Attach ColorGard® to clamps with stainless bolts and washers
provided. Bolts can be tightened with a 9/16" box-end wrench, or
ratchet (lower left). On larger jobs a 1/2" drive electric impact will
expedite this work. Tension bolts to 20 ft. lbs. (27 N.m.)
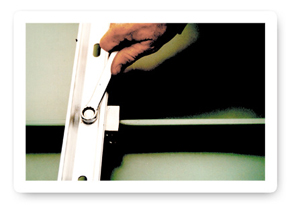 Attach ColorGard® to clamps
with stainless bolts and washers provided. Bolts can be tightened with
a 9/16" box-end wrench, or ratchet (lower left). On larger jobs a 1/2"
drive electric impact will expedite this work. Tension bolts to 20 ft.
lbs. (27 N.m.)
Add splice pieces at each ColorGard® joint as shown.
The "dimple" in the splice piece will automatically provide a 1/8"
space between adjoining sections to allow for linear thermal expansion
of the ColorGard®.